Hi there, I’m Peter Cow, and I was the chief Permaculture designer for the Rodmell Food Forest. If you want to hear more about the story of the design and development of this innovative forest, you’re in the right place.
I got involved in the Rodmell Food Forest after a phone call from Adam, asking if I was willing to assist with the design process for a new growing space near Rodmell. I moved into Lane House for 6 weeks in October/November 2012, working with Adam on the overall Permaculture design for the area, and then with him and others on the implementation of the hugelculture beds, fencing, pond and the start of the forest plantings.
I’m a SADIst – Start with a Survey
I started, as always in Permaculture, with Surveying. The acronym I use to remind myself of my preferred design pathway, is SADI – Survey, Assess, Decide, Implement. Life does not always keep to this structure, and is usually more complex and occuring on many levels at once, especially in large projects such as this, but the value of SADI is well known to me – it reminds me to observe and gather information and learn the landscapes before jumping into ideas and actions. Protracted observation followed by clever action is the key to good design in Permaculture.

Before I even arrived, I had Adam send me some satellite maps of the land , so I could start to get to know it. I was particularly interested in the site’s aspect, as the more southerly a slope faces, the more sunshine it receives. This field face North East, as does all of the property, so its solar gain is limited by that.
When I arrived, I set up home in a spare room at Lane House, and met the project instigator’s – Roger, Susie and Adam. Adam had been staying with Roger and Susie for nearly a year, working on their gardens and with their horses, and he called me in to help with the large edible landscape design they were envisioning.
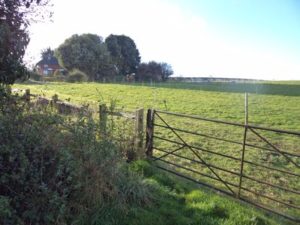 Lane House is a large property on the hill above Rodmell village. The word Rodmell means red clay, which we found a lot of in our landscaping! The house has several fields and outbuildings around it, which are grazed by, and shelter 3 horses. The proposed growing site was downhill from the house – an old pony paddock full of clover and with a small new herb garden in the corner.
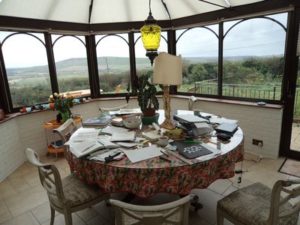 Roger and Susie graciously gave us a conservatory for our use, and we set up a design studio with a commanding view out over the field, and across the Ouse valley behind.
I learnt about their vision for the property, and the aims for this project in particular from Adam. Adam had also done some good work mapping some of the contours onto the field (lines drawn across the slope that indicate land that is at the same altitude – ie level – like the brown lines on UK Ordnance Survey maps). We spent some time learning the landscapes of shade, wind, slope, vegetation and water in this field – gathering information about what was there, and what energies move through the site before bringing any new ideas. Permaculture founder Bill Mollison talks about Vuja De – which is the opposite of Deja Vu -Vuja De reminds us that we have never been in this unique design situation before, and it therefore requires our attention and diligence to learn about it, rather than just plonk down a solution that worked well somewhere else and may not be so appropriate here.
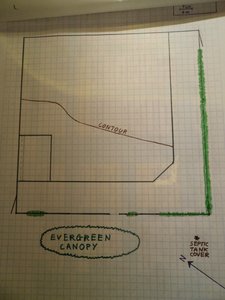 We measured the field using paces, and worked with a base map that Adam had made already. This is a record of all the fixed features on the site. In our case this was a vehicle access track, fences, nearby trees and one contour line.
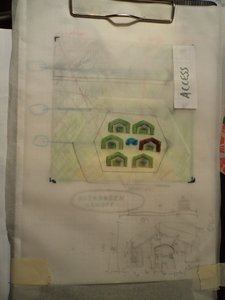
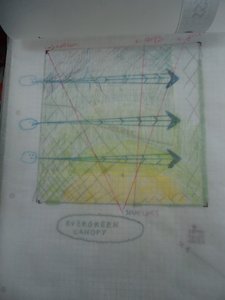 We then created overlays on tracing paper, to add in the ‘sectors’ (wild energies moving through the site such as wind, sunshine and views) and the relative accessibility of different areas of the site (‘permaculture zoning). These zones are marked in different colours to indicate the relative ease of getting to each area, so we can design to place features that need more maintenance in areas where they are easily accessed.
Adam had been thinking about making long swales across the field – ditches and berms on contour, to catch the overland flow of water and hold it until it soaks into the landscape – reducing the need for watering and lessening the risk of soil and fertility erosion. My response was that these long beds wouldn’t be so use friendly, as you would need to walk all the way around the edge of each one before getting to the next one. I also wanted it to be oriented to the entrance fence line, so it offered a sense of harmony and integration with the upper garden to people as they entered.
Analysis and decisions – Working with Limits
One important part of surveying is identifying limiting factors. In the analysis phase, I think up and compare different strategies for removing or lessening the limiting factors. In this field, the major limiting factors I identified were – rabbits, only one day a week of maintenance labour, NE aspect (reducing the winter solar input, which is so crucial in the UK), strong wind, the vehicle/horse access track around the field and summer drying out.
The design we came up with was for a series of ‘Hugel beds’. This is a technique pioneered by Sepp Holzer in Austria (I think the name ‘hugel’ means mound in German). A hugel bed involces burying lots of wood underneath a raised bed. 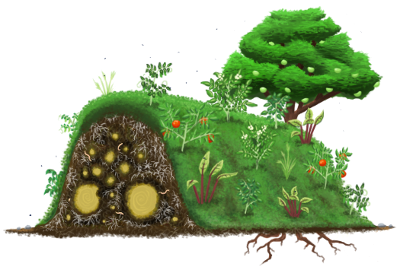 The wood slowly rots down, feeding the soil, and it enables a rich web of fungal mycellium underground that also transports nutrients and moisture around. The rotting wood also adds lots of organic matter into the soil, and holds moisture well. It is an intensive and disruptive creation process, which leaves you with a bed that, once it has settled down and filled with life, is rich and fertile for many years (depending on the size of the logs you put in!), and needs less watering.
We made the shapes of the beds so that they caught any overland water flow, and held it in an on contour side of the bed, thereby using some swale technology to catch the fertility and water moving across the landscape. The beds also have side ‘wings’ on them, to create more shelter from the wind, and an inner bed for annuals.
 The mounds of the hugel beds also gave us more solar gain, as they have multiple slanting sides – some of these face towards south and therefore concentrate sunshine and heat onto that part of the bed, creating a good microclimate for growing. Permaculture loves to create, observe and use microclimates, as humans instinctively do when they design a house, or sit down in a bus shelter. The range of microclimates created by this design means that a wide diversity of plants and shrubs can be grown – we created shadier places, sunnnier ones, wetter ones, more sheltered ones etc. nature thrives on diversity, and so does good permaculture design.
So the hugel beds dealt with some of the limits of water, fertility, aspect and wind. To deal with the rabbit issue we went for a traditional rabbit fence made from chicken wire, which we can grow climbers up in the future.
To cope with the low maintenance resource for such a large growing area, we decided to plant a lot of perennials – which don’t need to be replanted each year, outcompete weeds better, and need less watering and attention generally. These may take a few years to establish, but in the medium and long term provide a lot of food for little effort.
Wind is also a major challenge for the site – strong North Westerlies are often sweeping across the site, as it is an exposed valley side with little tree cover around. Our solutions to this came in a few guises :
To put tenderer plants near the existing hedgeline on the SE of the field.
To use the hugel beds as a way of providing some shelter (and happily these sheltered edges match with the areas of maximum winter/year round sunshine).
To create a food forest of trees and shrubs to the north and west of the main growing area.
To plant a serious, nitrogen fixing and fruit delivering shelterbelt along the NW edge of the field.
To put up a temporary plastic netting windbreak along the NW fenceline to help the shelterbelt establish and provide immediate but slight protection for the site. We also used some spare Leylandii brash to beef up the netting.
To put up a temporary netting next to the hugel beds until the forest and shelterbelt is more established.
The rabbit fencing was an expensive part of the design, so we made the beds area circular to minimise the amount of fencing required. Later we realised it would also be good to fence in the outer forest area, so the fencing eventually encompassed a larger area.
We also located the beds area in the closest area to the house, to maximise its chance of getting attention, and in the place that received the most year round sun. Happily, these were in the same place – the southern quadrant of the field.
The limiting factor of needing vehicle/horse access around the field was just incorporated into the design – we left space for a vehicle to move around outside the rabbit fencing.
After creating the pattern for the inner beds, we looked at the pattern for the outer forest, and especially the wind break features. We chose a shelterbelt of high Italian Alder – which is a relatively drought tolerant nitrogen fixing tree, which also fertilises the area around it with its root activity, annual root die off and autumn leaf drop. I chose Eleagnes x ebbingei to fill out the space underneath the alder trees – this is a nitrogen fixing, evergreen shrub that also fruits deliciously in April.
Implementation
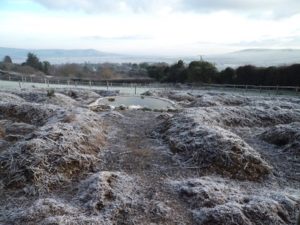
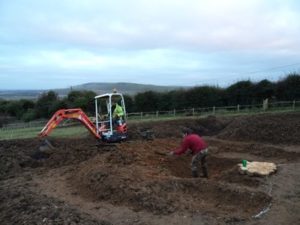
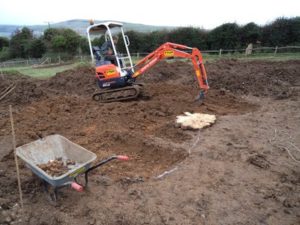
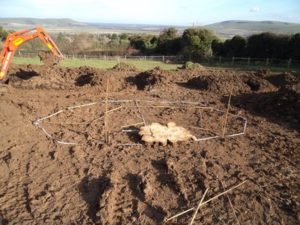
Having made the design for the inner beds, and aware that the oncoming winter weather would make the necessary digging and earthmoving more and more difficult, we hired a digger and a dumper, and made a big mess of the field!
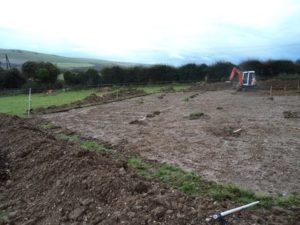 We first stripped off the turf, and stored it in piles.
We then dug out each individual bed, separating the topsoil and subsoil into different piles. The beds were then filled with a lasagna recipe of soil additives.
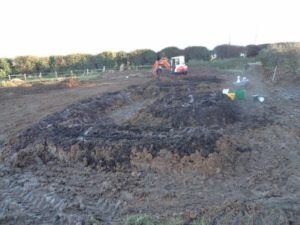 Spoiled hay bales went in at the bottom, followed by logs and branches (provided by some nearby clearing work, and a happy tree surgeon in nearby Ringmer).
We avoided the abundant Leylandii resources on site because we were concerned its innate chemicals would prevent decomposition and mycellial activity. 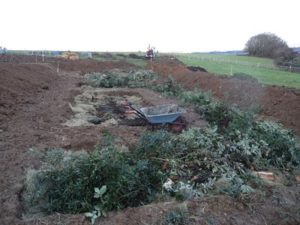 Then we placed the turves back in, folowed by the subsoil, then horse manure, a little biochar (inoculated with useful bacteria and mycellium, and some paramagnetic rockdust to bring the pH into balance and provide minerals.
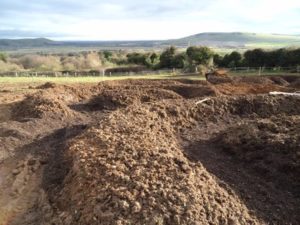
We then put the topsoil back on top, creating raised beds that are about 75cm tall and 1.5m wide.
Adam and Beka spread a biodynamic preparation all around the field, and the whole property, providing micro organism inoculation and energetic nourishment to the landscape.
 We sowed winter field beans on top, but the acorn harvest this year was terrible, and the hungry Jays that usually feast on acorns, feasted on our field beans instead. We covered the paths in between the beds with cheap oversized mulch from a nearby municipal composting facility, and added channels to send all passing water into the beds.
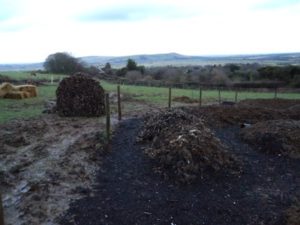 We then persuaded the neighbouring farmer to give us some of his spare bean chaff bales, which were rotting in his field, and used them to mulch the beds – mulching covers the soil and prevents erosion, nutrient leaching, evaporation and weed growth.
Living beans would have bean best, giving us extra nitrogen fixing and food as well as ground cover (the permaculture principle of multiple function), but the chaff worked well, providing us with quite a funky aesthetic as well as protection.
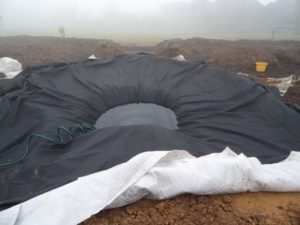
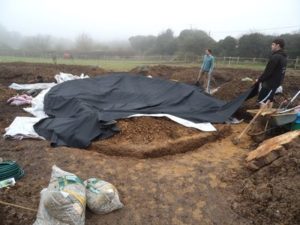
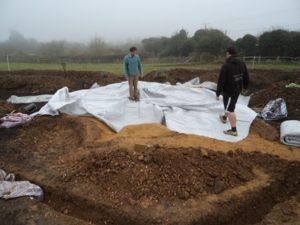
Having created our beds, we then put in the pond (see below), a shelterbelt of brash, netting and young trees on the NW side to protect the new area, and a rabbit fence around the whole area 
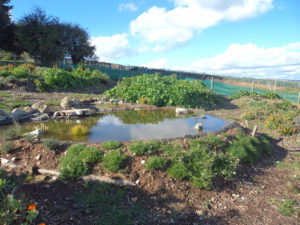
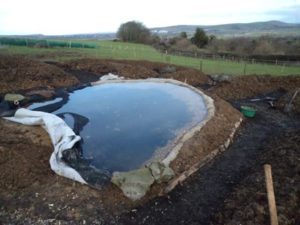
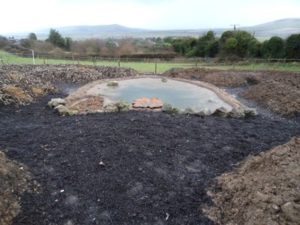

And with that the earthworks were complete (apart from a bit more rabbit fence digging in), and we could move onto planning and planting the shrubs, trees, perennials, herbs and annuals that will fill the food forest with nourishing, beautiful life.
Peter Cow http://www.livingincircles.com